


Remodel: Week 3
Big things are happening at Bramblewood!

Hi friends! It sure seems like a lot longer than 3 weeks that I’ve been peeing in a porta-potty, but maybe the big blue box just has that affect on you. Last week I posted a long overdue update on what we’ve been up to the first 3 weeks of this project, and here I am just one week later with another rundown. Are you ready!?
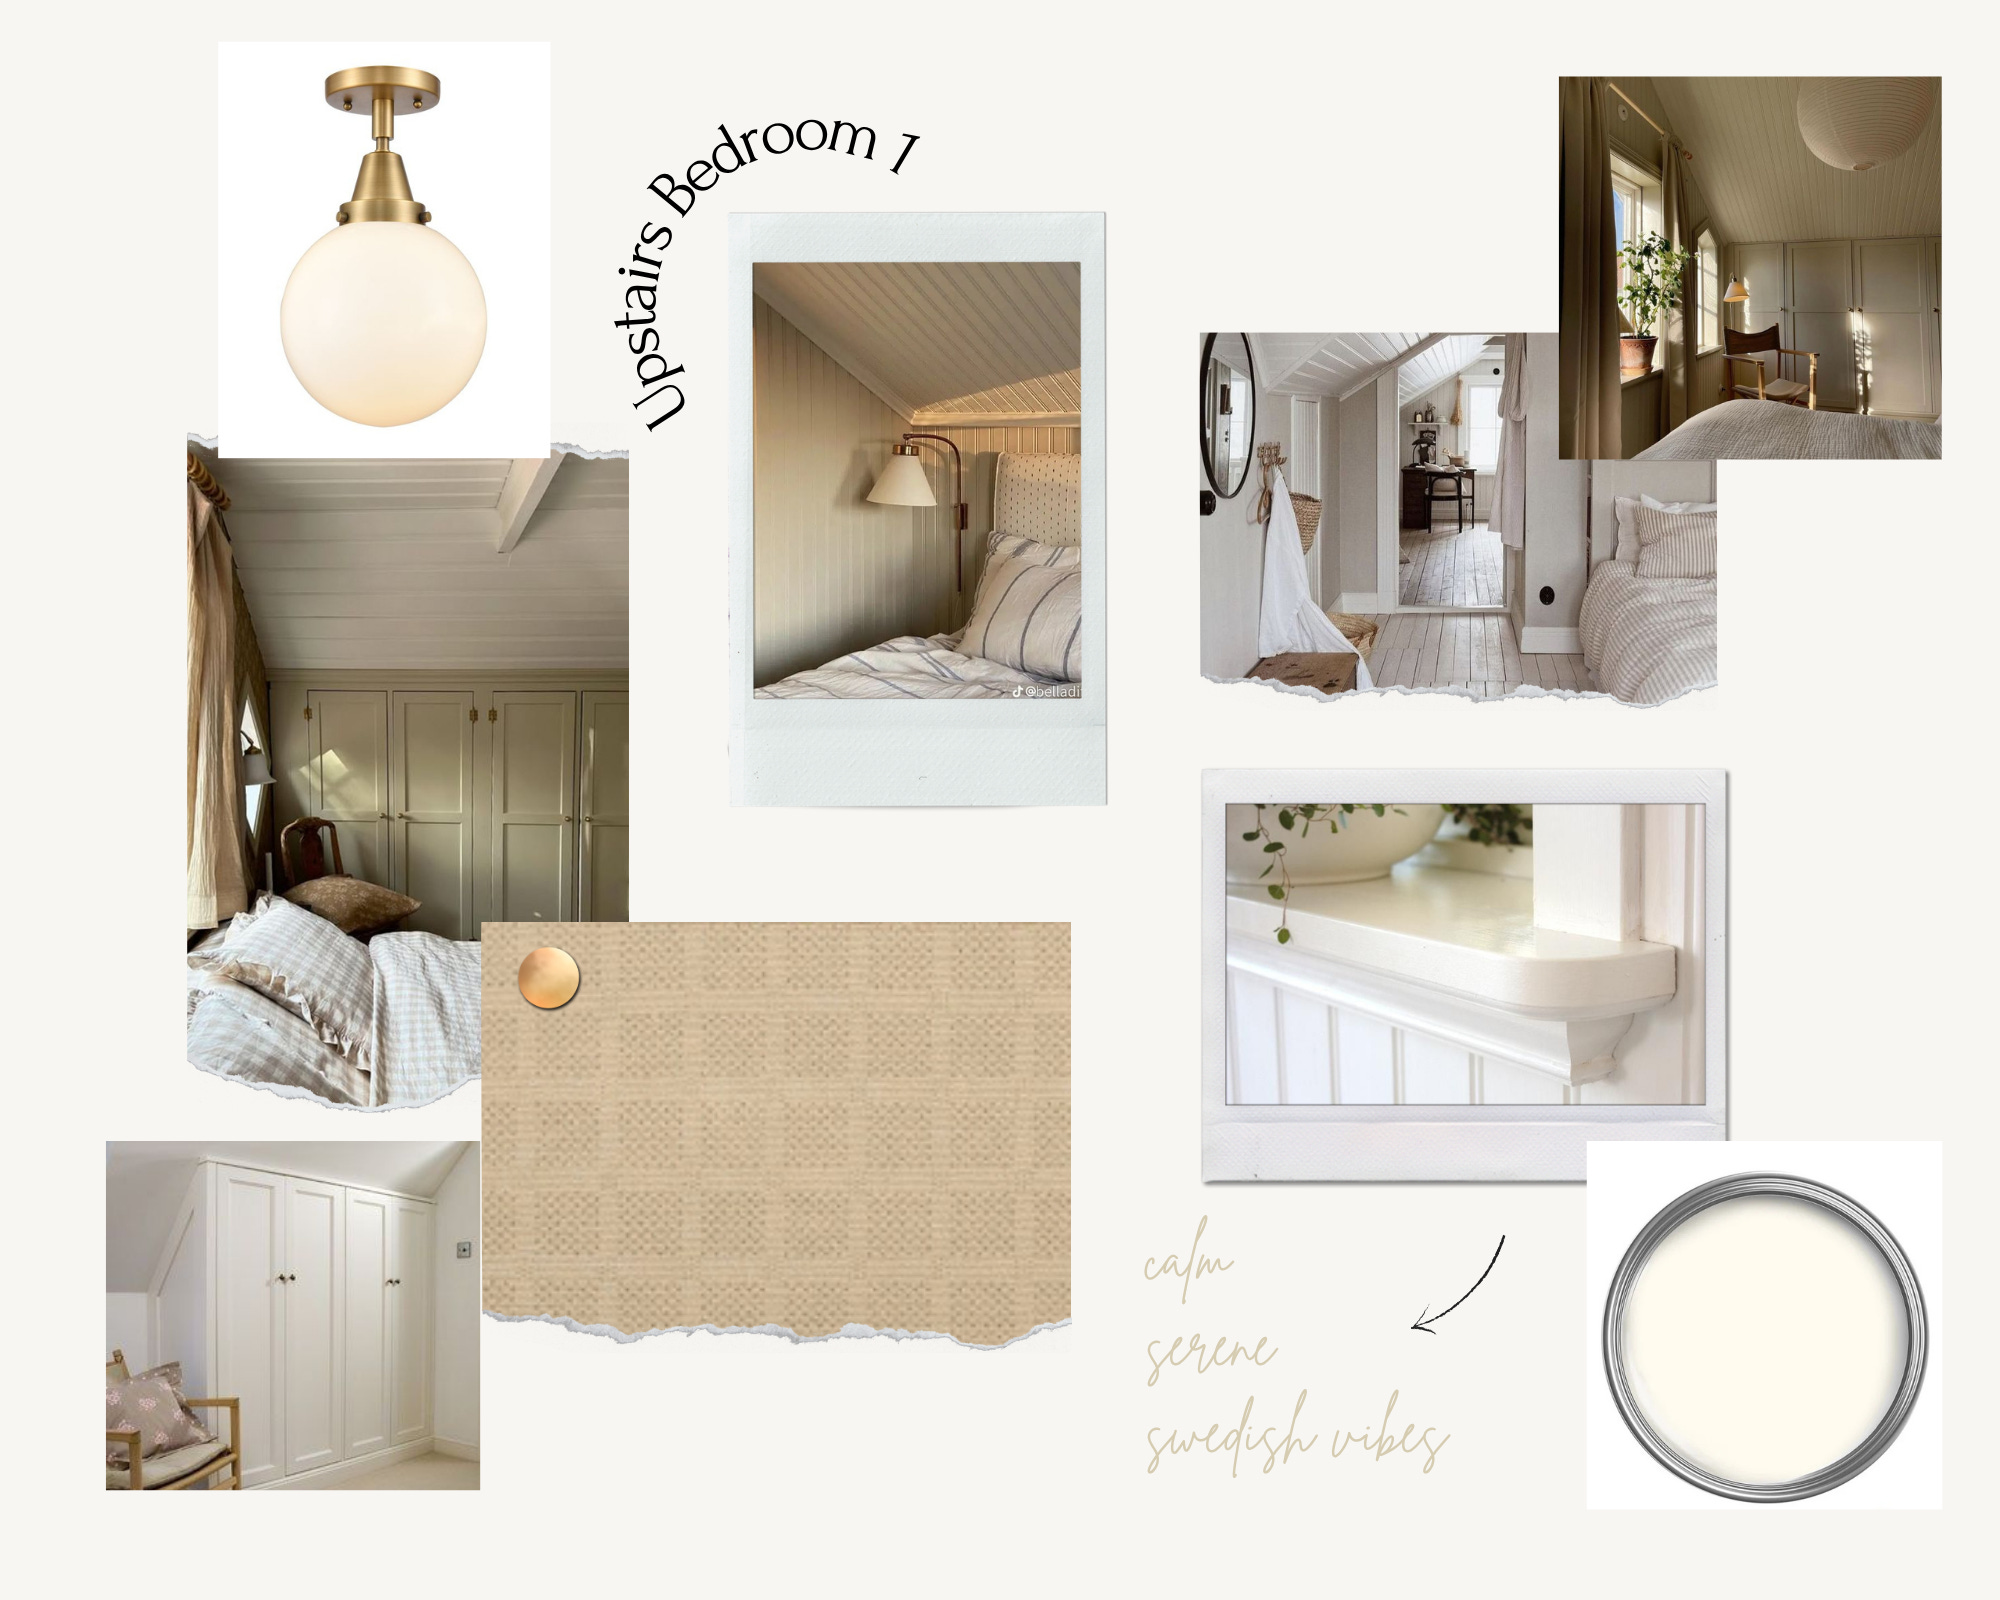
First things first, I’ve got a NEW POST over on the blog all about the upstairs bedroom spaces and my plans for those. It’s a real meaty one, complete with videos, before pictures and mood boards. Not to mention links to the products we’re using in those spaces. Head on over and check it out!
How do you deal with attic bedrooms?
The 1928 cottage that sits on our property- lovingly called Bramblewood- was originally about 800 square feet. In the 90’s there was an addition put on the front of the house (dining room, entry and current playroom) and the back of the house (mudroom, bathroom and current primary bedroom). There was also an addition to the attic space, taking it from a small storage spot, to two bedrooms and a bathroom. Now, some may argue that attic bedrooms are a terrible idea. But guess what folks? That’s what we’ve got. And I’m determined to not only make it work, but make it great!
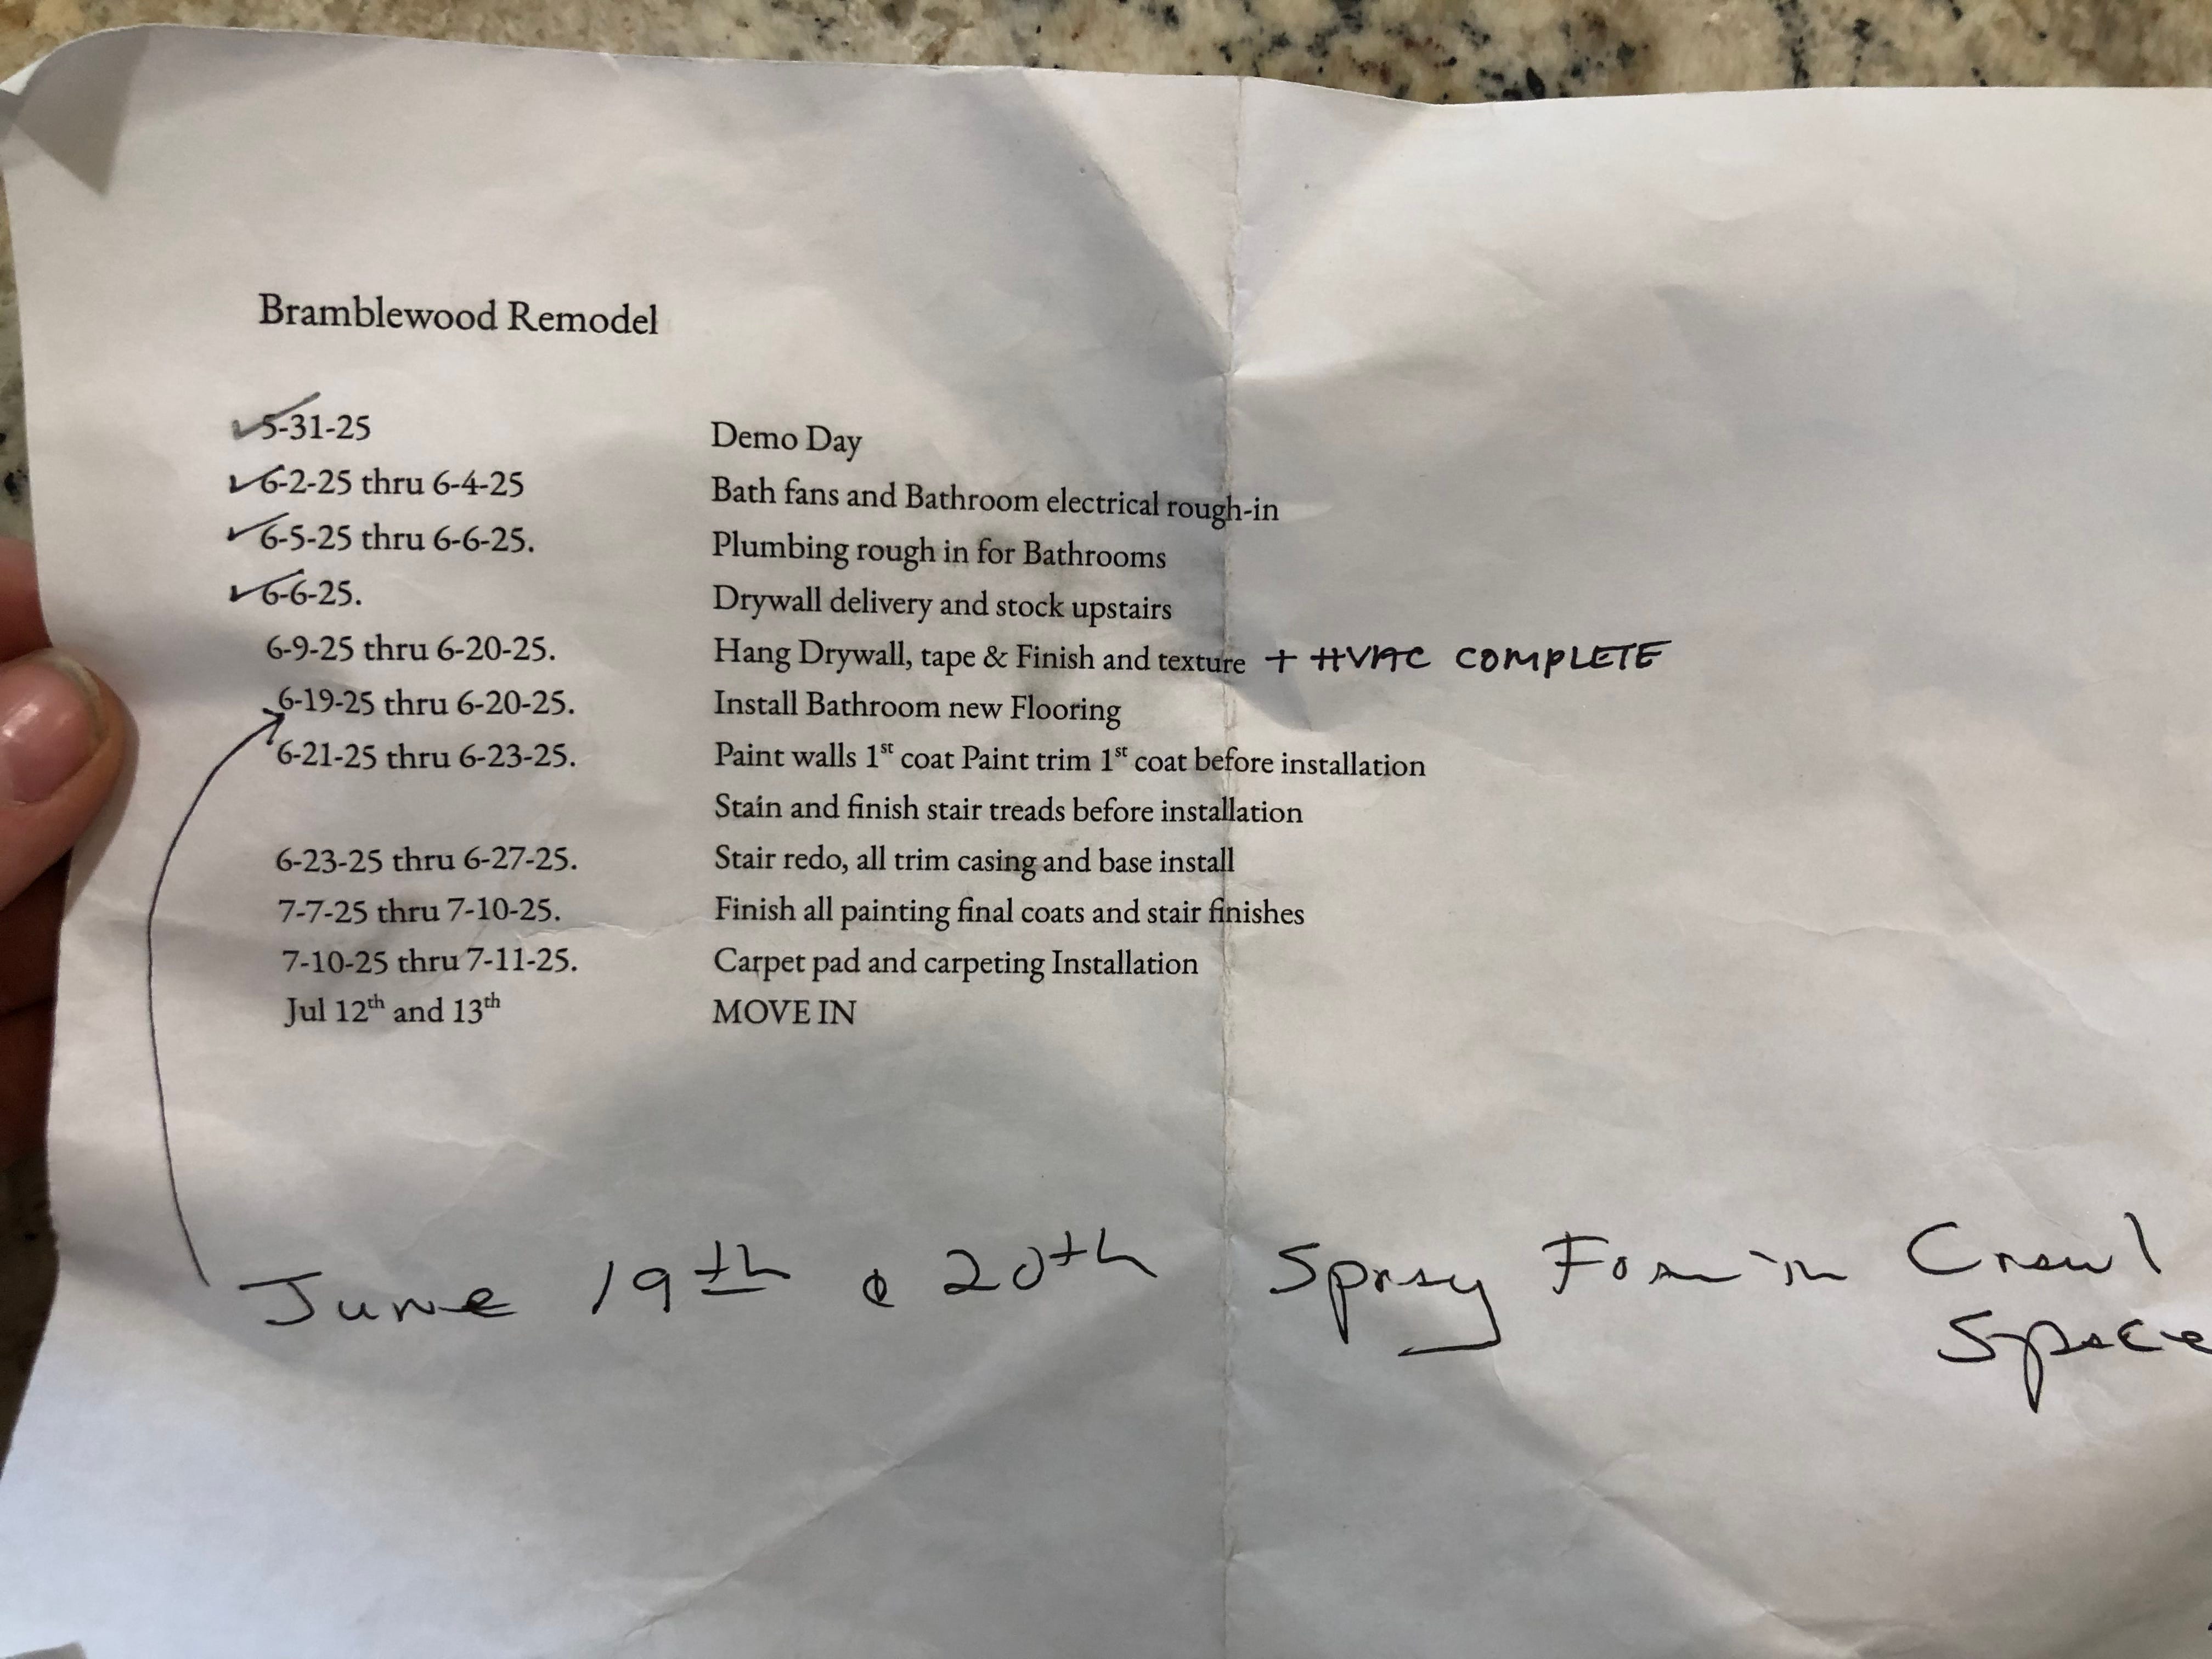
Okay, now for the overall updates. On my list for this week was:
Prime both bathrooms (upstairs and down), prime both bedrooms and the stairwell with SW ProMar 200 tinted Alabaster.
Stain the White Oak stair treads with Varathane Antique White.
Help with the install of both bathroom floors, select grout and work with installers to lay out tile floor.
Work with insulation guys to get them in and out from underneath the house.
Receive delivery of stair rail and base trim for upstairs.


Priming the walls. Thanks to my MIL and three of my best gals, we whipped the priming out by Tuesday. That felt like a HUGE relief. And we had a blast just chatting and painting away, while all our kiddos ran feral on the property.
It is not lost on me what a blessing it is to be in community with so many wonderful, faithful friends and family. We are rich in all the things that really matter in this life.
Staining the treads. The White Oak stair treads we purchased from Lumber Liquidators (same place we bought our pine floors 4 years ago) are so gorgeous. Seriously. The bare wood is just breathtaking. I basically wanted them to look exactly like they do raw, so I decided to use a white stain to just knock down the warmth a little and they turned out SO GOOD. I applied a coat of wood conditioner on each, a coat of stain and 2 coast of polycrylic.
I only got through 7 of the 14, so I’ve got more to do, plus the railing. But it’s raining this weekend, so it’ll have to be next week. I am so happy with how these are looking!


Bathroom floors. Here’s the really exciting thing from this week…THE FLOORS!
Yesterday the tile in the downstairs bathroom (pictured above) was installed. HOORAY! There are so many things with this project that have felt like a dream come true, but this tile might be at the top.
You see, I purchased this tile over 3 years ago. I purchased it with the hope that someday it would go in my bathroom. And in the last 3 years I had all but lost faith that might ever happen. I even tried to sell it for a while. The boxes sat out in the barn, unnoticed and unappreciated. Covered in dust. But no longer! Yesterday they took their rightful place and made our bathroom go from a 0 to a 10!
This tile is unique in that it’s a large 18” x 18” square, but looks like 4 individual tiles, complete with faux grout lines. The faux lines are a terra cotta color, and I wasn’t sure if I should match that or try something else. We ended up going with a Terra Cotta colored grout, which was not easy to find but I ordered this one and it was perfect. It was so fun watching the grout go in. I had a hard time not just standing outside the door watching the guy do it.


The upstairs bathroom floor also went in yesterday, and goodness, I’m just as pleased with this simple, classic sheet vinyl as I am with the gorgeous tile. This looks so realistic, has such a nice texture, is thick and high quality and will be so easy to clean. I am thrilled!


The last piece of exciting progress this week was the removal of all the old insulation under the house and (today!) the spraying in of brand new, closed-cell foam insulation. AKA NO MORE MICE. We are so thrilled about this, I can’t even tell you. And the way these fellas- dressed like minions- took care of the nasty old stuff was seriously impressive.
Monday the finish carpenter arrives. Lots more good stuff to come! What do you think!? Leave me a comment!
